Transferring data from iMac to MacBook Air is easy with methods like Migration Assistant, iCloud, AirDrop, and File Sharing. For more flexibility, AnyViewer lets you transfer files remotely, even across different networks.
Yes, you can! Apple offers several built-in tools like iCloud Drive and AirDrop that make syncing files between an iMac and a MacBook Air easy and efficient. This means you often don't need third-party services such as Dropbox or Google Drive. However, to ensure smooth syncing and avoid technical issues, both Macs must be running the latest macOS and software updates.
If you need to transfer and keep files up to date across both Macs, we've got a few solutions to help you achieve that. The method you use to sync files will depend on your specific needs.
How do I transfer data from iMac to MacBook Air? Here are the four Apple built-in tools that you can use for transferring data from iMac to MacBook Air.
If you're moving data from one Mac to another, Migration Assistant is a great tool for the job. This built-in macOS app allows you to seamlessly transfer apps, files, accounts, and settings from your iMac to your MacBook Air. Before learning how to transfer data from iMac to MacBook Air, make sure both Macs are ready:
Set up Migration Assistant on your MacBook Air:
Step 1. Press Command + Space, type "Migration Assistant," and open the app.
Step 2. Click "Continue," then enter your password when prompted.
Step 3. Choose your transfer method and click "Continue."
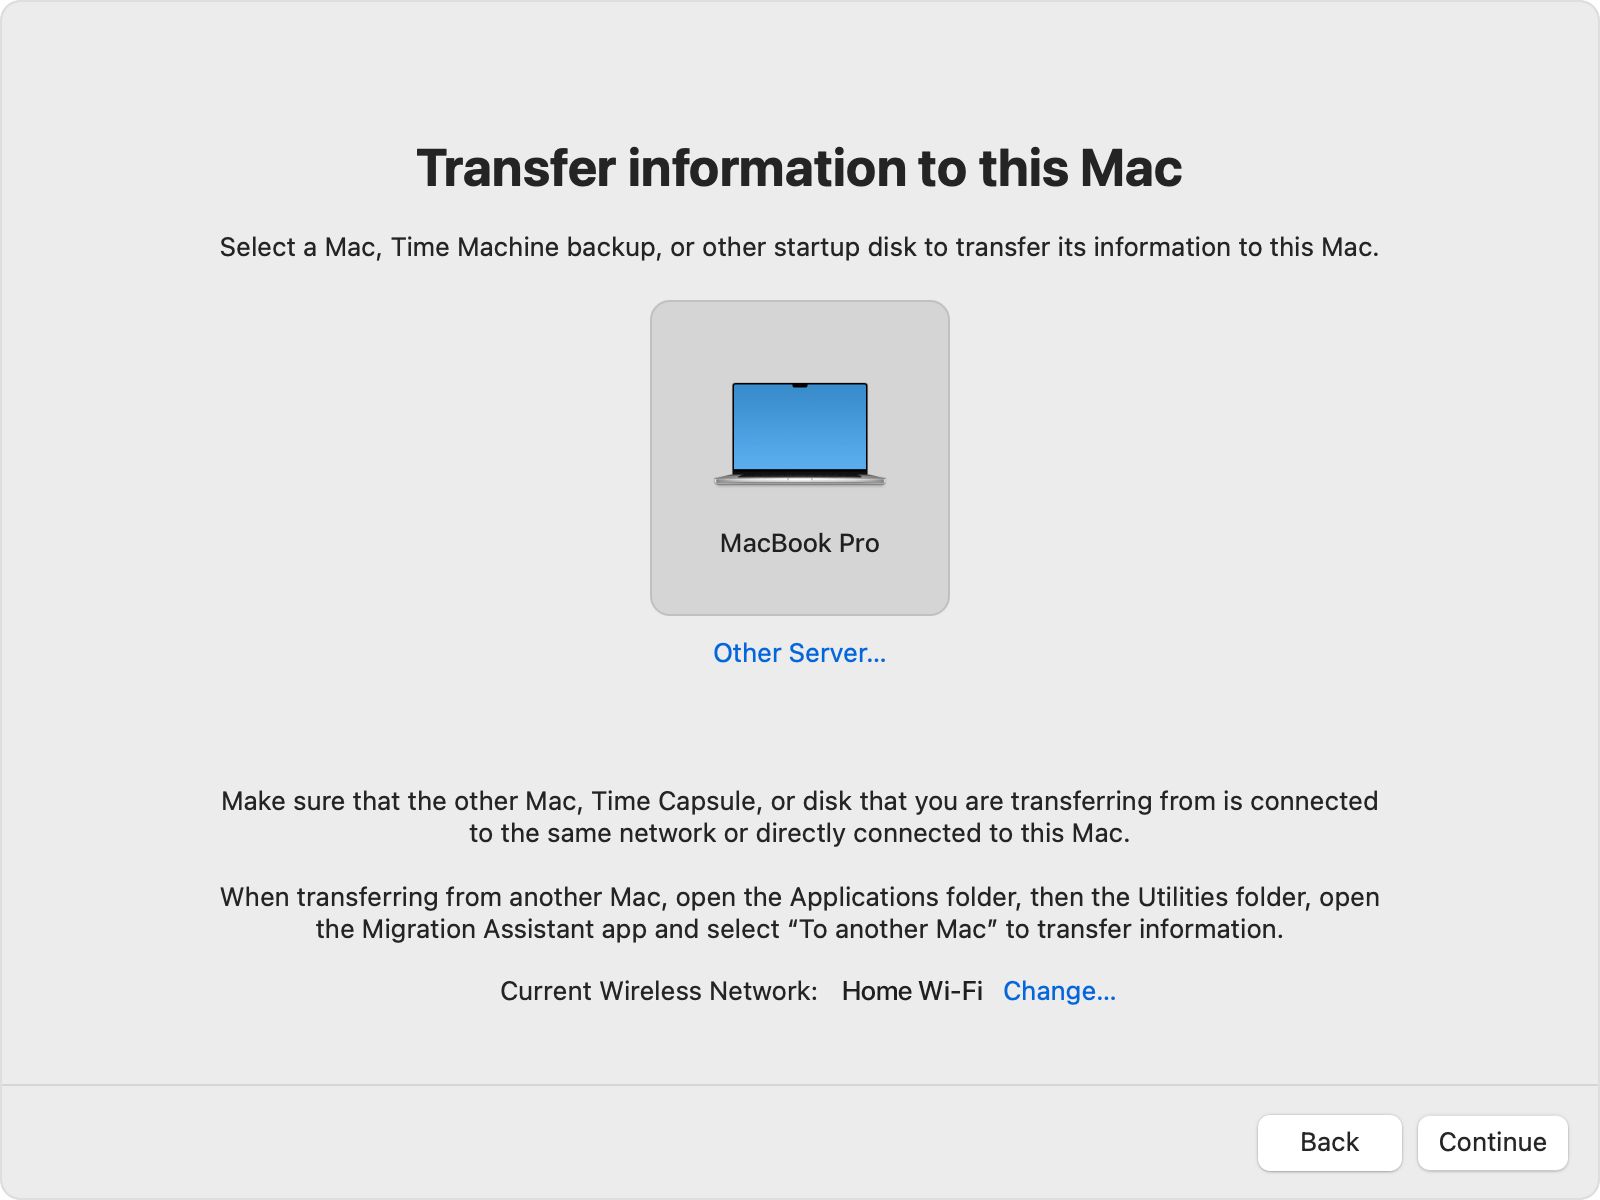
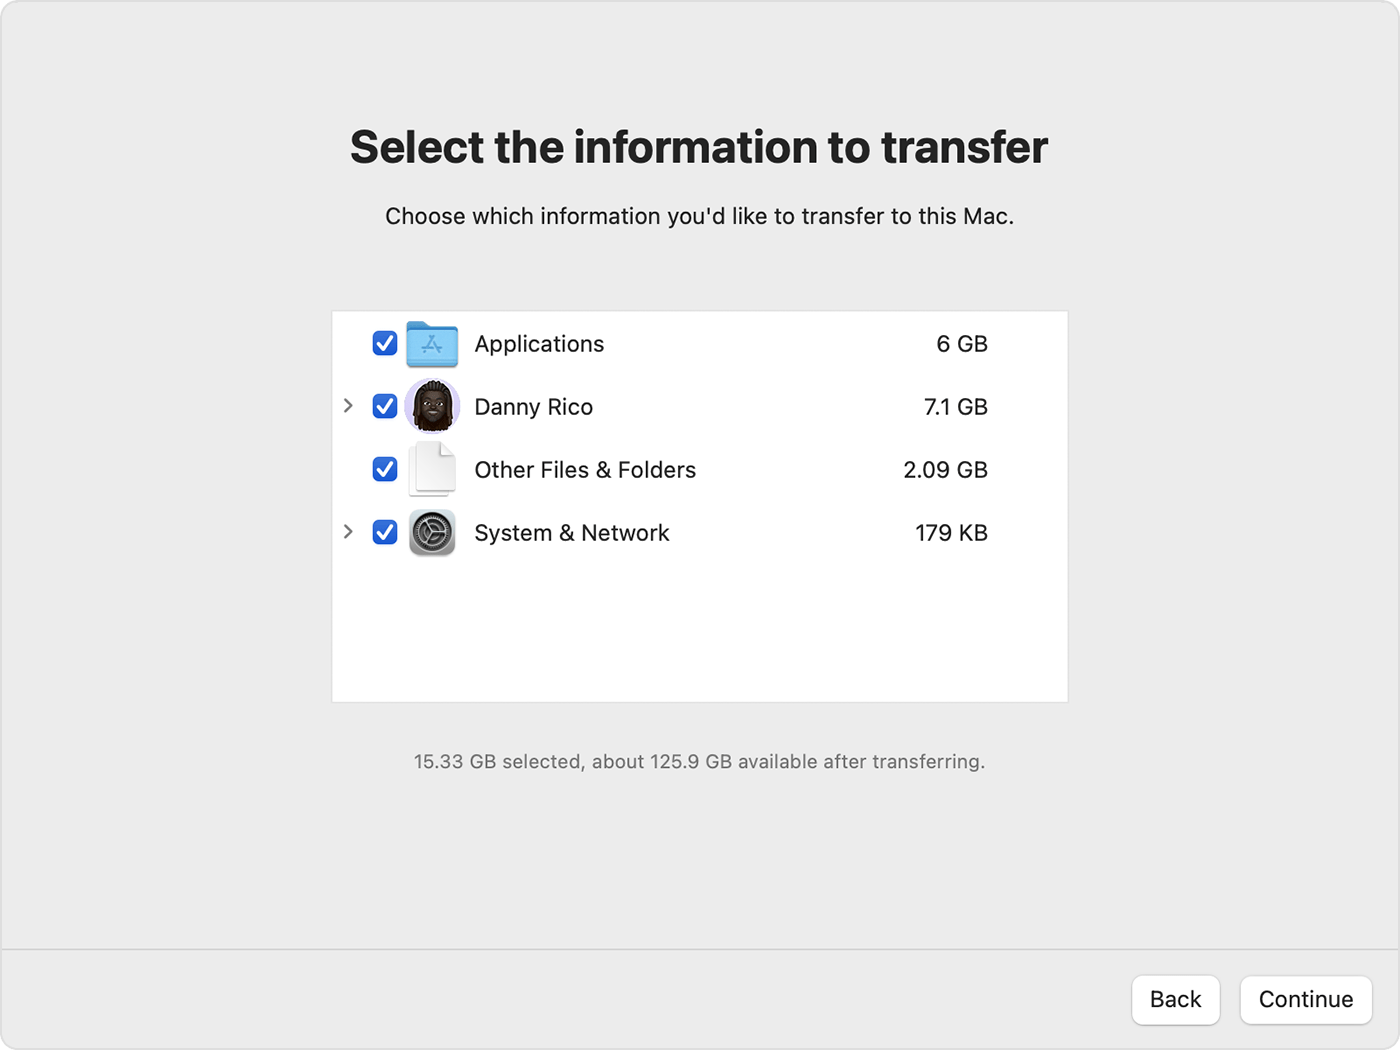
Step 4. Select the iMac from the available options and click "Continue." You can now choose which files to transfer.
On the iMac:
Step 1. Open Migration Assistant.
Step 2. Choose the option to transfer data to another Mac.
Step 3. When the two Macs connect, a security code will appear on both screens. Confirm that they match.
Keep in mind that large transfers can take several hours, during which you won't be able to use the Macs, so plan accordingly.
iCloud offers an easy way to sync your devices, including your MacBook, iPhone, or iPad. When you're logged into the same Apple ID, any file saved on one device automatically updates across all of them, so you’re always working with the latest version. Keep in mind, though, that deleting a file on one device removes it from all devices.
To set up iCloud on your iMac:
Step 1. Open the Apple menu and go to System Settings.
Step 2. If you're not signed into your iCloud account, click Sign In at the top of the sidebar.
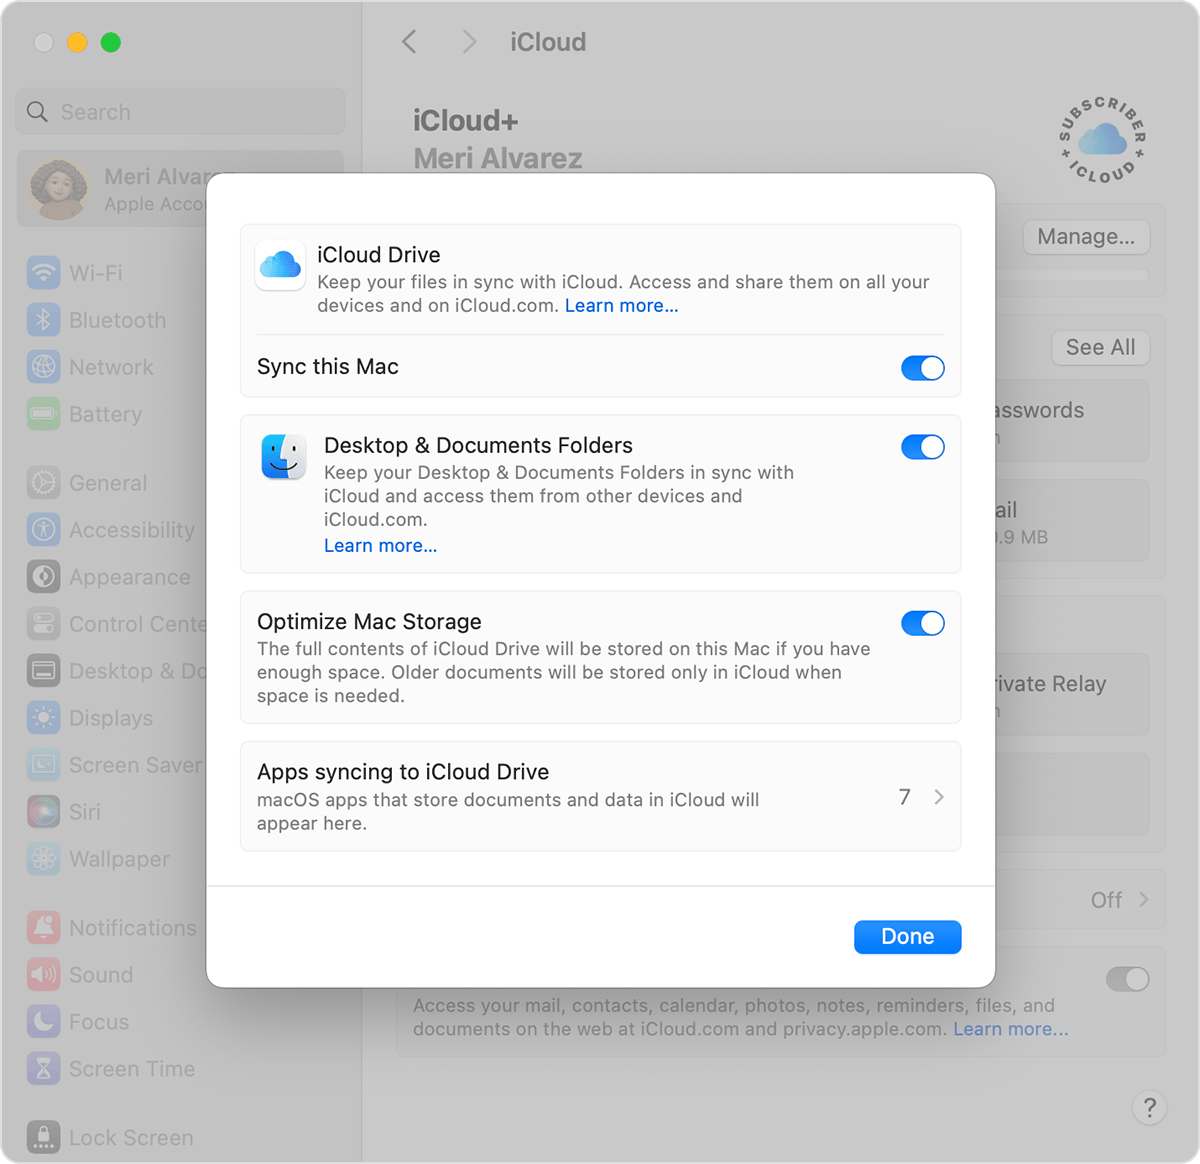
Step 3. Select Drive and toggle iCloud Drive on.
Step 4. Enable Desktop & Documents Folders to sync these folders with iCloud.
To download files on your MacBook Air:
Step 1. Go to iCloud.com and click Sign In.
Step 2. Enter your email or phone number and sign in with your password or Passkey.
Step 3. Navigate to your iCloud Drive, select the files you want on your Mac, and click the Download button to save them locally.
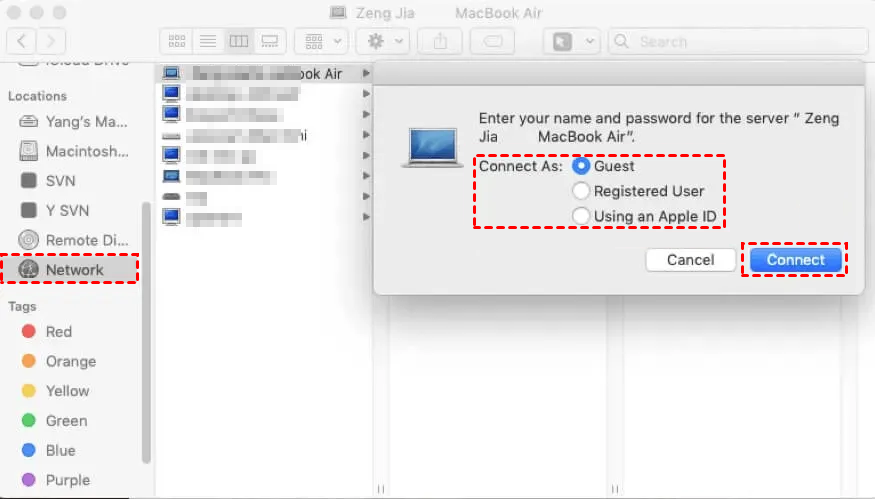
If cloud storage is limited or iCloud isn’t an option, file sharing provides a reliable alternative for transferring files between Macs. With file sharing, you can either share your entire system or select specific folders to transfer.
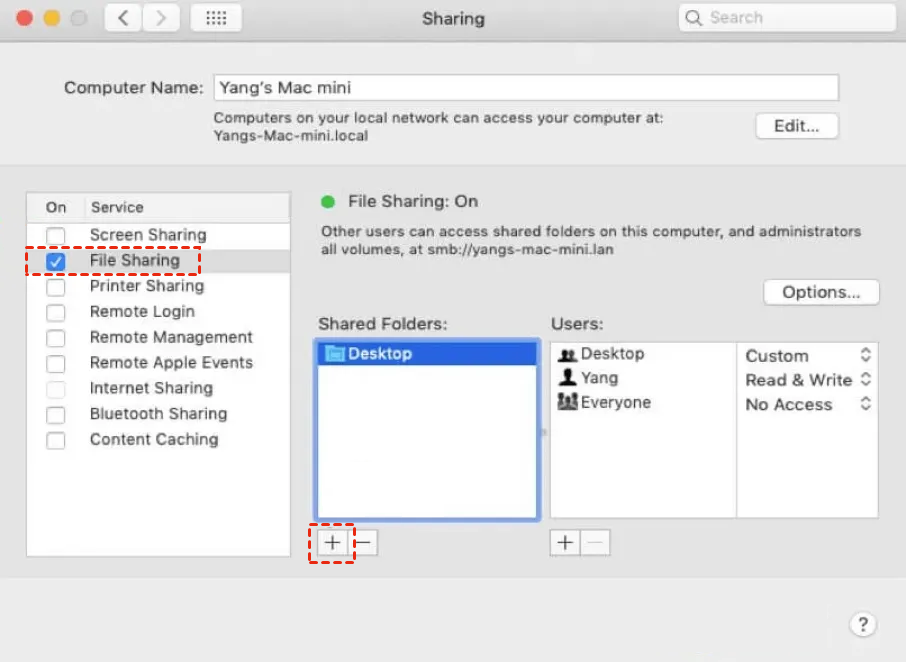
To set up file sharing:
Step 1. Go to System Settings > General > Sharing.
Step 2. Click the info button next to File Sharing and turn it on. If you wish to share your entire Mac, enable full disk access.
Step 3. To share a specific folder, click the + button, select the folder you want to share, and click Open.
Step 4. Select the folder from the Shared Folders list, then click the + button. You can now share this folder with someone from Users & Groups or Contacts.
Step 5. Adjust access permissions by clicking the pop-up menu next to each user and selecting Read & Write, Read Only, or Write Only.
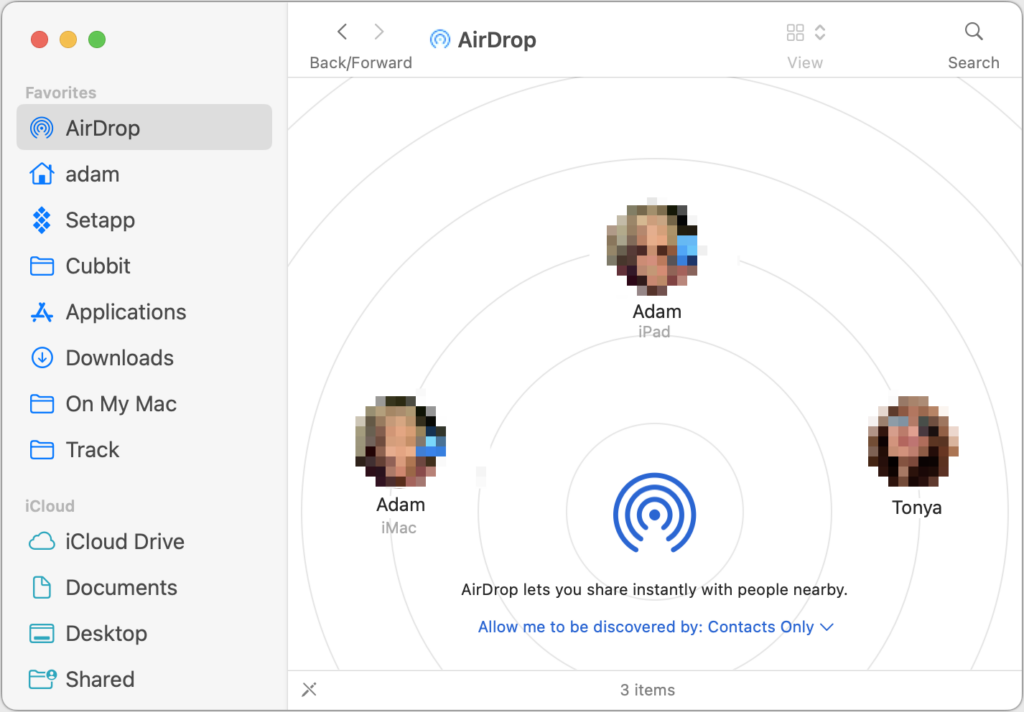
AirDrop is a convenient way to transfer photos, videos, documents, and more between Apple devices without needing an internet connection. It’s especially useful if you often use your Mac offline, as it allows for seamless file transfers even when you're not connected to a network.
However, keep in mind that AirDrop doesn't sync files. For example, if you edit a document, the changes won't automatically update on another Mac unless you send the updated version again.
Before using AirDrop, make sure to:
To send a file via AirDrop:
Step 1. Click the Control Center icon in the menu bar and ensure AirDrop is turned on.
Step 2. Open the file you want to share, click the AirDrop icon in the toolbar, and select the receiving device.
Step 3. On the receiving Mac, click Accept when the AirDrop notification appears.
AirDrop also supports sharing passwords and passkeys. To do this, simply add the recipient’s iCloud email address to your contacts and send the password via the Passwords app.
AnyViewer stands out as one of the best remote desktop solutions for transferring data between Macs over the internet, regardless of their location. Compared to the four Apple-built file transfer methods mentioned earlier, AnyViewer offers several key advantages:
How to transfer data from iMac to Mac Air using AnyViewer
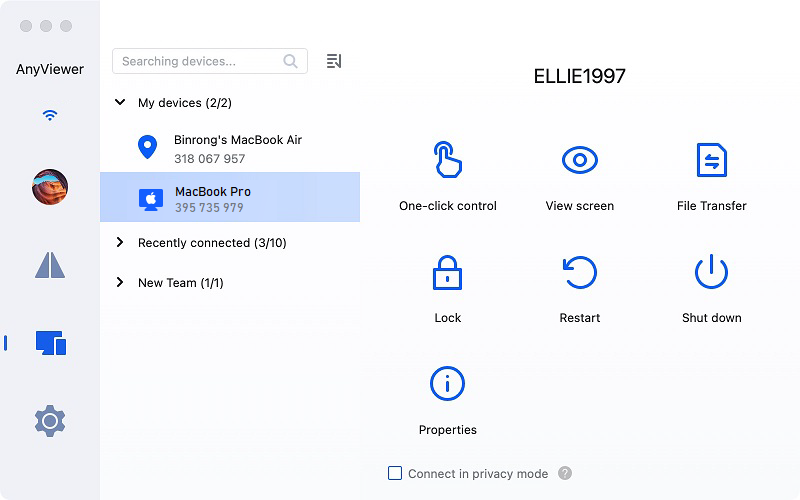
Step 1. Download and install AnyViewer on both Macs.
Step 2. Log in to both devices using the same AnyViewer account.
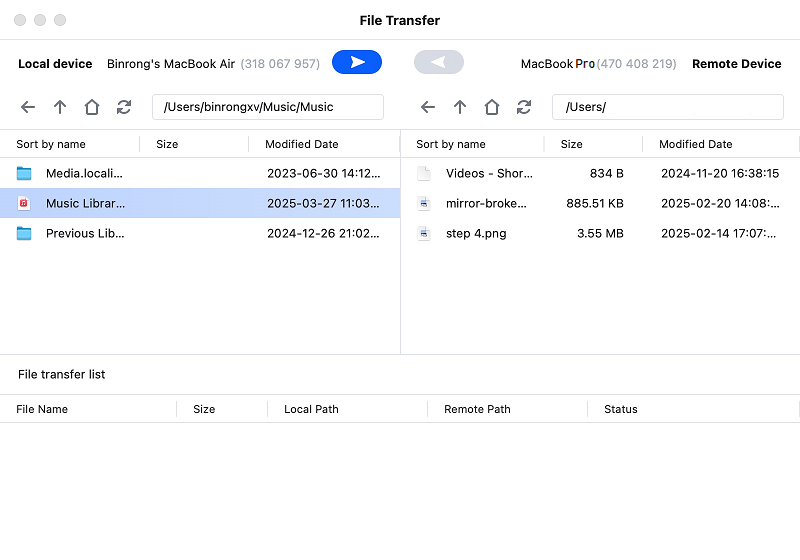
Step 3. On your local Mac, locate the remote Mac in the device list and select "File Transfer." Alternatively, you can select "One-Click Control" to remotely access the unattended Mac and initiate the transfer directly from the toolbar.
Step 4. In the File Transfer Manager, choose the files you want to transfer and click the arrow to begin the transfer process.
To enhance transfer speed and overall efficiency, consider upgrading to an AnyViewer Professional or Enterprise plan. These premium plans offer the following benefits:
In conclusion, how to transfer data from iMac to MacBook Air is simple with several options available, such as Migration Assistant, iCloud, AirDrop, and File Sharing. These built-in tools make it easy to sync your devices. For even more flexibility, AnyViewer offers a great alternative, allowing data transfers across different networks and devices. Whether you use Apple’s tools or AnyViewer, transferring data between your iMac and MacBook Air is easy and hassle-free.