Running low on disk space? This guide shows you how to move your SQL Server database files to another drive without causing issues. Follow the easy steps to change file locations, fix permission problems, and get your database back online. Plus, see how AnyViewer can help you do it all remotely.
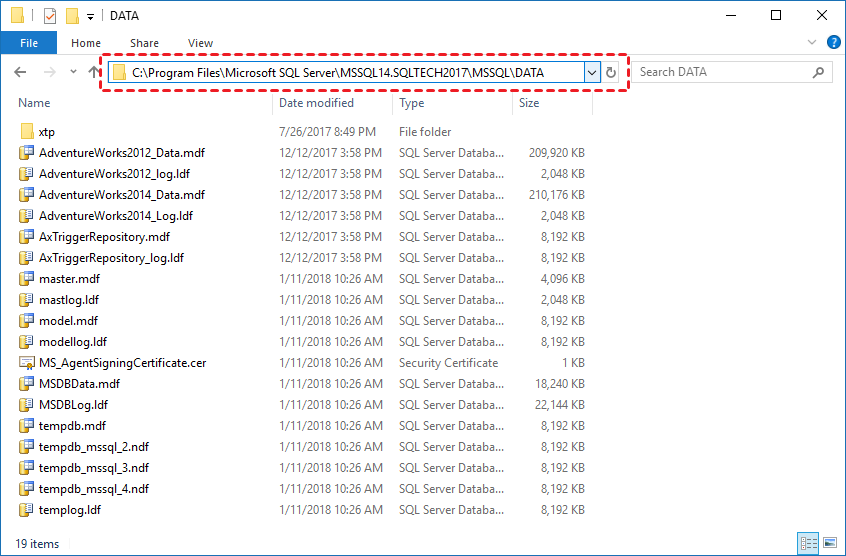
Running out of disk space on a drive that hosts your SQL Server database files is a common issue, especially in non-production environments where databases can be quickly recreated or restored from backups. By default, SQL Server saves its database files, MDF (primary data file) and LDF (log file), in the "Data" subfolder found within the SQL Server installation path. This is the default storage location unless manually changed during database setup.
But what if the database is part of a live, production system or is actively being accessed by an application? In such cases, you can't simply delete or recreate the database. Instead, you need to move the SQL Server database files to another drive with more free space, without disrupting the SQL Server instance that hosts them.
This guide will walk you through exactly how to move database files to another drive safely using a real-world example with the AdventureWorks database.
Here are the detailed steps to move SQL DB files to another drive while keeping the database hosted on the same SQL Server instance.
Before proceeding, make sure of the following:
Note: File names may vary, so double-check you are targeting the right files before attempting to move SQL Server database files to another drive.
Step 1. Set the new file location using SQL script
Open SQL Server Management Studio (SSMS) and run the following SQL statements to point to the new file path:
|
ALTER DATABASE AdventureWorks2014 MODIFY FILE ( NAME = AdventureWorks2014_Data, FILENAME = 'E:\New_location\AdventureWorks2014_Data.mdf'); GO
ALTER DATABASE AdventureWorks2014 MODIFY FILE ( NAME = AdventureWorks2014_Log, FILENAME = 'E:\New_location\AdventureWorks2014_Log.ldf'); GO |
Replace 'E:\New_location\' with the actual folder path on your target drive. Make sure this folder already exists.
Step 2. Set the database offline
This step disconnects all users and prepares the files for moving:
|
ALTER DATABASE AdventureWorks2014 SET OFFLINE; GO |
If there are active connections, this command may fail; ensure all users are disconnected.
Step 3. Move the files manually
Step 4. Check SQL Server access to the new location
If SQL Server doesn't have permission to access the new folder, you'll see an error like:
|
Msg 5120, Level 16, State 101, Line 13 Unable to open the physical file “E:\New_location\AdventureWorks2014_Data.mdf”. Operating system error 5: “5(Access is denied.)”. |
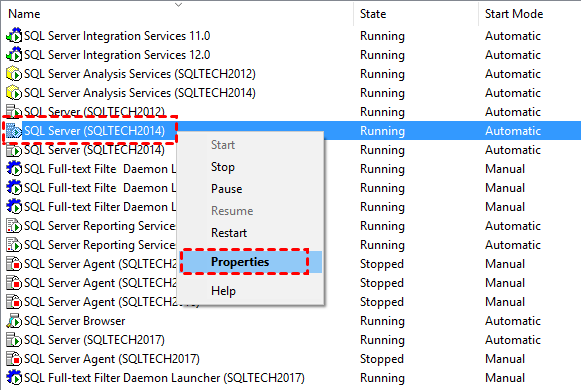
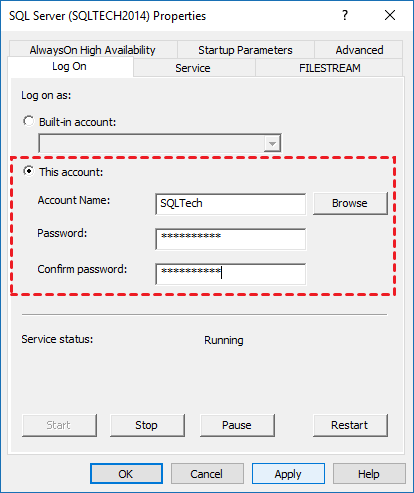
To fix this:
Right-click on the SQL Server instance and choose Properties.
Step 5. Bring the database back online
Once the files are in place and access is verified, set the database online:
|
ALTER DATABASE AdventureWorks2014 SET ONLINE; GO |
Step 6. Verify the new file location
To confirm the database is using the new location, run:
|
SELECT name, physical_name AS NewLocation, state_desc AS OnlineStatus FROM sys.master_files WHERE database_id = DB_ID(N'AdventureWorks2014') GO |
You should see your MDF and LDF paths pointing to the new drive.
Now your SQL Server database files are safely hosted on a drive with more available space. You can continue normal operations with improved storage flexibility.
If you're managing SQL Server environments remotely or overseeing multiple servers across different locations, AnyViewer can significantly simplify the process of moving SQL Server database files to another drive.
AnyViewer is a secure and high-speed remote access solution that allows database administrators (DBAs) and IT professionals to connect to SQL Server hosts from anywhere. Instead of physically accessing the server or relying on complicated VPN setups, you can use AnyViewer to remotely log in, execute SQL scripts, and move database files (.mdf and .ldf) across drives, all without disrupting critical operations.
Why use AnyViewer for this task?
How it fits into the process
Step 1. Visit the official AnyViewer website and download the app on both computers. Install the software.
Step 2. Launch the app and sign up for a free AnyViewer account. Log in with the same account on both devices.
Step 3. On your local computer, go to the Device tab. Find the remote SQL Server computer in the list and click One-click control to establish a remote connection.
Step 4. Once connected, you can manually move the SQL Server database files to a new location on a different drive on the remote machine.
Whether you're managing cloud-hosted VMs or on-premise servers, AnyViewer ensures you can perform sensitive SQL Server file operations safely and efficiently from anywhere.
Moving SQL Server database files to another drive doesn't have to be a daunting task, as long as you follow the right steps. From setting the new file path and taking the database offline, to verifying access and bringing it back online, each step plays a crucial role in ensuring a smooth transition without data loss or downtime.
And when managing remote SQL environments, tools like AnyViewer make the process even more seamless. With secure remote access, file transfer capabilities, and cross-device control, AnyViewer is the ideal solution for database administrators who need flexibility, security, and efficiency while handling file movements, whether onsite or halfway across the globe.